Android SDK User Interface & Simple Android Example [Tutorial]

In our last Android tutorial we discussed with Manifest file and major working aspect of android OS. Today I am illustrating the simple example of android using android SDK,through which I will elaborate basic configuration needed for any Android application,I also cover some part of android SDK User Interface.
User Interface and First Example
Now, after following this post,you may conclude that ' how it will take effect when user clicks on button' ,with the help of simple example .
For that we are having an application where a user clicks on button, after that the edit text contains a string gets swapped.
So, to create a project, here is a following procedure-
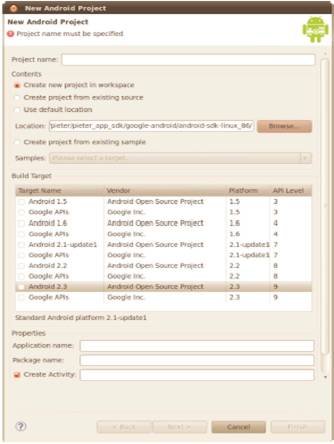
1. Launch Eclipse and select File -> New -> Project. In the “New Project” dialog box, select “Android” node, then “Android Project” and then click “Next.” You will then see the “New Android Project” dialog box, as shown in Figure
2. As shown in Figure, enter FirstAndroid as the project name, pro.android as the package name, FirstActivity as the activity name, and FirstAndroidApp as the application name. Note that for a real application, you’ll want to use a meaningful application name because it will appear in the application’s title bar. Also note that the default location for the project will be derived from the Eclipse work-space location. The New Project Wizard appends the name of the new application to the work-space location.
3. Click the “Finish” button, which tells ADT to generate the project skeleton for you. For now, open the HelloActivity.java file under the src folder and you can see the onCreate() method something like as follows:
<code>
public void onCreate(Bundle savedInstanceState)
{
super.onCreate(savedInstanceState);
setContentView(R.layout.main);
}
</code>
User Interface Development-
Now we are concentrating on development of user interface, as I speak earlier post we can create user interface by using XML very easily manner.In ‘res’ node, ‘layout’ node contain “main.xml” which is responsible for creation of user interface.
If you double click on main.xml, it will show you “Graphical Layout” format of user interface, default, it will contain textview and it contains some strings.Just right click on it, Delete it.On the bottom, click on main.xml, inside ‘LinearLayout’ paste this code-
<code>
<EditText android:id="@+id/edt1"
android:layout_width="fill_parent"
android:layout_height="wrap_content"
/>
<EditText android:id="@+id/edt2"
android:layout_width="fill_parent"
android:layout_height="wrap_content"
/>
<Button android:text="Swap"
android:id="@+id/btn"
android:layout_width="wrap_content"
android:layout_height="wrap_content"
/>
</code>
If you see, we are using two editText field and one button. We are going to swap data containing editText field.
In every component, there is field called ‘id’, it will use for generate ‘R.java’ file, so by this we can use it in main.java.
Width and height of component can decided by android:layout_width and android:layout_height respectively. Here wrap_content and fill_parent are types for deciding how components look primarily. Button field contain text type where the text which we have written in it, appears on button.
Main.java File -
Main.java file contain in ‘src->pro.android’ node. In this, paste below code between ‘setContentView… and second last parenthesis.
<code>
edt1=(EditText) findViewById(R.id.edt1);
edt2=(EditText) findViewById(R.id.edt2);
btn=(Button) findViewById(R.id.btn);
btn.setOnClickListener(new OnClickListener() {
@Override
public void onClick(View v) {
str1=edt1.getText().toString();
edt1.setText(edt2.getText().toString());
edt2.setText(str1);
}
});
</code>
But before this declare components as-
EditText edt1,edt2;
Button btn;
String str1;
In above code-
- ‘findViewById’ used to Find a view that was identified by the id attribute from the XML that was processed in
onCreate(Bundle). - ‘setOnClickListener()’ register a callback to be invoked when this view is clicked. If this view is not clickable, it becomes clickable.
- OnClickListener()- Interface definition for a callback to be invoked when a view is clicked.
- onClick (View v)- Called when a view has been clicked.
Parameter- ‘v’ The view that was clicked.
Look at the code inside onClick() method
<code>
str1=edt1.getText().toString();
edt1.setText(edt2.getText().toString());
edt2.setText(str1);
</code>
Here we can write code as follows-
<code>
str1=edt1.getText().toString();
str2=edt2.getText().toString();
edt1.setText(str2);
edt2.setText(str1);
</code>
Important Note-
So, here we have to think one major factor that, we are developing code for mobile technology, which is having less memory, processor efficiency, which concerns a lot. For str2 we have to give memory, so we have to think each byte in terms of memory efficiency.
How To Run It :
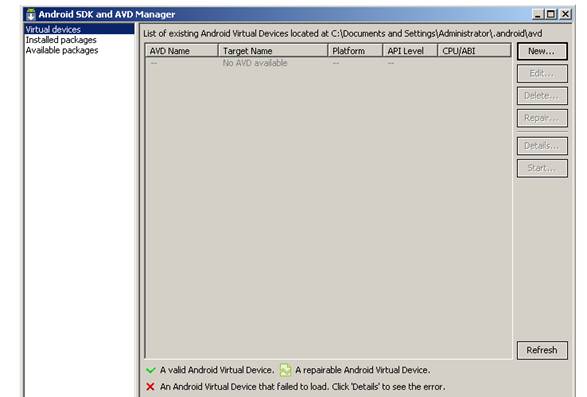
Screen 1:
Click on ‘New’, it will show following screen
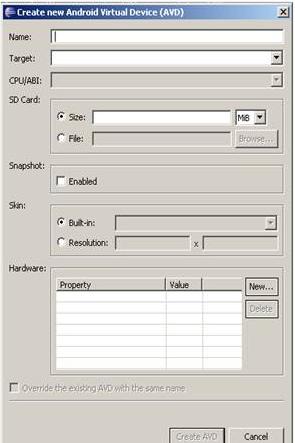
Give Name as ‘Android2.2’. Here, you can give any name. Target field specify as you previously decided while at the start of creation of project. Try to select HVGA skin for our application.
Click on ‘Create AVD’.
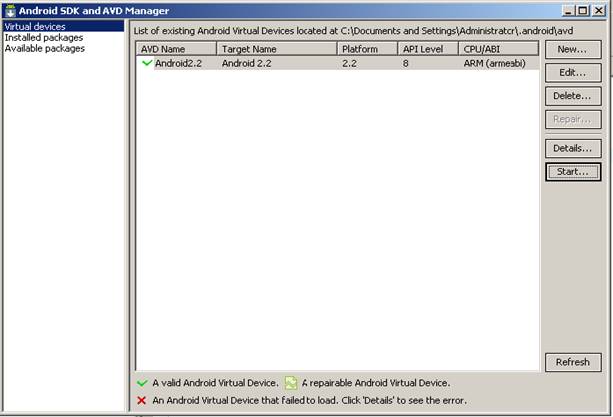
After this it will show following window-
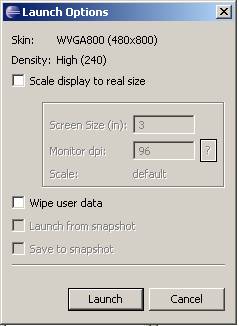
Select AVD name and click on Start, it will show following window-
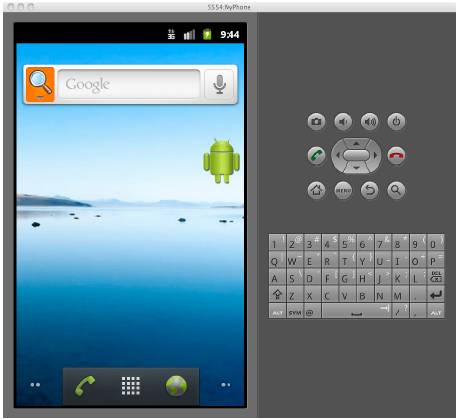
Click on ‘Launch’. It will create following window-
Here is your AVD i.e. Android Virtual Device, on which you can run your applications.


